
Where Do Screenshots Go On Windows 10: A Comprehensive Guide
Windows 10 provides users with a convenient way to capture screenshots, whether it's to capture an important moment, save a webpage, or share information with colleagues or friends. However, once you take a screenshot, you might find yourself wondering, "Where do screenshots go on Windows 10?" In this article, we will delve into the various locations where your screenshots are saved, providing you with a detailed and comprehensive guide.
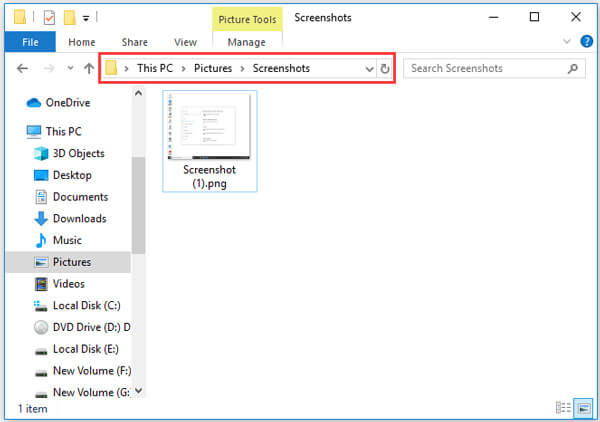
Screenshots Folder in Pictures
If you use the built-in screenshot feature on Windows 10, your screenshots are automatically saved in the Screenshots folder within the Pictures directory. This folder is located in your user profile folder, and you can easily access it by following the path: C:\Users\YourUsername\Pictures\Screenshots.
The Screenshots folder in the Pictures directory is the default location for screenshots taken using Windows 10's built-in feature. It provides a convenient and organized way to store your screenshots. By default, screenshots are saved in the PNG file format, which offers high-quality images with lossless compression. This ensures that your screenshots retain their clarity and detail, making them suitable for various purposes, such as presentations, documentation, or personal records.
If you take frequent screenshots, you might find it useful to create subfolders within the Screenshots folder to further organize your screenshots. For example, you can create subfolders for different projects, categories, or time periods. This can help you quickly locate specific screenshots when needed, especially if you have a large collection of screenshots.
Accessing Screenshots Folder in Pictures
To access the Screenshots folder in the Pictures directory, follow these steps:
- Open File Explorer by pressing Windows key + E or by clicking on the folder icon in the taskbar.
- Navigate to the Pictures folder.
- Find and open the Screenshots folder.
Alternatively, you can also access the Screenshots folder by manually entering the path in the File Explorer's address bar: C:\Users\YourUsername\Pictures\Screenshots.
Clipboard
When you capture a screenshot using the Snipping Tool or other third-party applications, it is temporarily saved to the clipboard. The clipboard is a temporary storage area in your computer's memory that holds data you have copied or cut. In the case of screenshots, they are stored in the clipboard as image data until you paste them into an image editing program or directly into a document or email.
The advantage of the clipboard is that it allows you to quickly capture and paste screenshots without the need to save them as separate files. This can be useful for situations where you only need the screenshot temporarily or if you want to quickly share the screenshot with someone without cluttering your computer's storage.
However, it is important to note that the clipboard has limited capacity, and once you copy something else, the previously copied screenshot will be replaced and lost from the clipboard. Therefore, if you plan to use the screenshot later or want to keep a permanent copy, it is recommended to save the screenshot as a file instead of relying solely on the clipboard.
Pasting Screenshots from the Clipboard
To paste a screenshot from the clipboard into an image editing program or document, follow these steps:
- Open the desired program or document where you want to insert the screenshot.
- Click on the location where you want to insert the screenshot.
- Press Ctrl + V or right-click and select "Paste" to insert the screenshot from the clipboard.
Once pasted, you can further edit or save the screenshot as needed.
OneDrive
If you have enabled OneDrive on your Windows 10 computer, your screenshots may be automatically synced and saved to the cloud. OneDrive is a cloud storage service provided by Microsoft, allowing you to access your files from any device with an internet connection.
By saving your screenshots to OneDrive, you can ensure that they are securely backed up and accessible even if something happens to your local computer. This can be particularly useful if you use multiple devices or frequently switch between computers.
To check if your screenshots are being saved to OneDrive, open the OneDrive app and navigate to the Pictures folder. Here, you should find a Screenshots subfolder where your screenshots are stored. If you don't see the Screenshots folder, it's possible that the screenshots are not being automatically saved to OneDrive. In that case, you can enable the "Camera roll" backup option in the OneDrive settings to ensure your screenshots are synced.
Enabling OneDrive Backup for Screenshots
To enable OneDrive backup for screenshots, follow these steps:
- Open the OneDrive app by clicking on the cloud icon in the system tray.
- Click on the "More" button (three dots) in the top-right corner of the app.
- Select "Settings" from the dropdown menu.
- Go to the "Backup" tab.
- Under "File protection," check the box next to "Automatically save screenshots I capture to OneDrive."
Once enabled, your screenshots will be automatically saved to the Screenshots folder in OneDrive, ensuring that they are backed up and accessible across all your devices.
Desktop
If you choose to save your screenshots directly to the desktop, they will appear as files on your desktop. This can be a convenient option if you frequently need to access your screenshots or if you prefer to organize them in a specific way.
When you save a screenshot to the desktop, it is stored as a file with a name that includes the date and time of capture. By default, screenshots saved to the desktop are in the PNG file format, which offers high-quality images with lossless compression. This ensures that your screenshots retain their clarity and detail, making them suitable for various purposes.
However, it is important to keep in mind that the desktop is a visible and frequently used location on your computer. Saving too many screenshots to the desktop can quickly clutter your screen and make it difficult to find other files or icons. Therefore, it is recommended to periodically organize and move your screenshots to a more suitable location, such as the Screenshots folder in Pictures or a custom folder structure.
Saving Screenshots to the Desktop
To save a screenshot directly to the desktop, follow these steps:
- Take a screenshot using the desired method, such as the Print Screen key or Snipping Tool.
- When the screenshot preview appears, click on the "Save" button or press Enter.
- In the Save As dialog box, choose the desktop as the save location.
- Enter a descriptive name for the screenshot if desired.
- Click on the "Save" button to save the screenshot to the desktop.
Once saved, you can easily access and manage your screenshots directly from the desktop.
Game Bar
If you enjoy gaming on your Windows 10 computer, you might be familiar with the Game Bar feature. The Game Bar allows you to capture screenshots and record gameplay footage while playing games. When you capture screenshots using the Game Bar, they are saved in a folder named "Captures" within the Videos directory.
The Game Bar is a built-in feature in Windows 10 that can be accessed by pressing the Windows key + G. It provides various gaming-related functions, including screen capture, recording, and performance monitoring. By default, screenshots taken with the Game Bar are saved in the MP4 file format, which allows for high-quality videos with efficient compression.
The Captures folder within the Videos directory is the default location for screenshots and recordings captured with the Game Bar. This separation from other types of media files helps you quickly locate and manage your gaming-related captures. However, it is worth noting that screenshots taken with the Game Bar are saved as video files, so you may need to convert them to image files if you prefer the traditional screenshot format.
Accessing Captures Folder within the Videos Directory
To access the Captures folder within the Videos directory, follow these steps:
- Open File Explorer by pressing Windows key + E or by clicking on the folder icon in the taskbar.
- Navigate to the Videos folder.
- Find and open the Captures folder.
Alternatively, you can also access the Captures folder by manually entering the path in the File Explorer's address bar: C:\Users\YourUsername\Videos\Captures.
Screenshots Folder in the Screenshots Directory
Windows 10 also has a separate Screenshots directory where screenshots taken with the Game Bar or certain third-party applications are saved. This directory can be accessed by following the path: C:\Users\YourUsername\AppData\Local\Packages\Microsoft.Windows.ShellExperienceHost_YourPackageId\TempState\ScreenClip.
The Screenshots folder within the Screenshots directory is another location where Game Bar screenshots and some third-party application screenshots are stored. This folder is hidden by default, so you may need to adjust your folder settings to make it visible. Screenshots saved in this location are in the PNG format, which ensures high-quality images with lossless compression.
It is worth mentioning that the Screenshots folder within the Screenshots directory is a temporary location, and screenshots saved here may be automatically deleted after a certain period or when your computer restarts. Therefore, if you want to keep a permanent copy of a screenshot taken with the Game Bar or specific third-party applications, it is recommended to save it to a different location, such as the Pictures or Videos directory.
Accessing Screenshots Folder within the Screenshots Directory
To access the Screenshots folder within the Screenshots directory, follow these steps:
- Open File Explorer by pressing Windows key + E or by clicking on the folder icon in the taskbar.
- In the address bar, enter the following path: C:\Users\YourUsername\AppData\Local\Packages\Microsoft.Windows.ShellExperienceHost_YourPackageId\TempState\ScreenClip.
- Press Enter to navigate to the Screenshots folder within the Screenshots directory.
Alternatively, you can enable the display of hidden folders in File Explorer settings to make the Screenshots folder visible.
Documents Folder
In some cases, screenshots may be saved in the Documents folder on Windows 10. This can happen if you are using specific applications or have changed the default screenshot location. The Documents folder is a common location where users store personal files, documents, and other important data.
If your screenshots are being saved in the Documents folder, it is recommended to periodically organize and move them to a more appropriate location, such as the Screenshots folder in Pictures or a custom folder structure. This helps maintain a clear and organized file structure, making it easier to locate and manage your screenshots.
Accessing the Documents Folder
To access the Documents folder on Windows 10, follow these steps:
- Open File Explorer by pressing Windows key + E or by clicking on the folder icon in the taskbar.
- Navigate to the Documents folder.
You can also directly access the Documents folder by entering the following path in the File Explorer's address bar: C:\Users\YourUsername\Documents.
Custom Locations
Windows 10 allows you to choose a custom location to save your screenshots. This can be useful if you prefer to organize your files in a specific way or want to save screenshots to an external drive for additional storage or backup purposes.
By default, the Screenshots folder in the Pictures directory is used to save screenshots taken with the built-in feature. However, you can change this default location to a different folder or drive of your choice. This customization option provides flexibility and allows you to align your screenshot storage with your personal preferences and workflow.
To change the default screenshot location, follow these steps:
- Open the Windows Settings by clicking on the Start menu and selecting the gear icon, or by pressing Windows key + I.
- Click on "System."
- In the left sidebar, select "Storage."
- Under "More storage settings," click on "Change where new content is saved."
- Choose a different drive or folder location for the "Screenshots" option.
After changing the default screenshot location, any screenshots you capture using the built-in feature will be saved in the new specified location.
Email Attachments
If you choose to send a screenshot directly via email, it will be saved as an attachment in your email client's sent items or drafts folder. This allows you to easily access the screenshot when needed without having to navigate to a specific folder on your computer.
When sending a screenshot via email, it is important to consider the file size and the recipient's email system limitations. Large attachments can cause delays in sending or receiving emails and may exceed the maximum attachment size allowed by the email service provider.
Some email clients also offer the option to automatically resize or optimize attachments before sending, which can help reduce file size and improve compatibility. Alternatively, you can manually resize or compress the screenshot before attaching it to the email to ensure a smoother transmission and better recipient experience.
Attaching Screenshots to an Email
To attach a screenshot to an email, follow these steps:
- Open your email client or webmail interface.
- Compose a new email message.
- Click on the "Attach" or "Insert" button, typically represented by a paperclip icon.
- Navigate to the location where the screenshot is saved.
- Select the screenshot file and click on the "Attach" or "Open" button.
- Complete the email and send it to the desired recipient.
The screenshot will be attached to the email as a file, ready for the recipient to download and view.
Temporary Files
In some cases, screenshots may be saved as temporary files on your Windows 10 computer. Temporary files are files that are created and used for a specific purpose, such as caching or storing temporary data.
Temporary screenshots are often stored in the AppData directory, specifically in the Temp folder. The AppData directory is a hidden folder that contains application settings, files, and temporary data for user-specific programs.
It is important to note that temporary files are typically deleted automatically by the system or the application once they are no longer needed. Therefore, if you want to keep a permanent copy of a screenshot, it is recommended to save it to a different location, such as the Pictures or Videos directory.
Accessing Temporary Files Folder
To access the temporary files folder on Windows 10, follow these steps:
- Open File Explorer by pressing Windows key + E or by clicking on the folder icon in the taskbar.
- In the address bar, enter the following path: C:\Users\YourUsername\AppData\Local\Temp.
- Press Enter to navigate to the Temp folder.
Alternatively, you can access the Temp folder by typing "%temp%" (without quotes) in the search bar or the Run dialog box (Windows key + R) and pressing Enter.
Conclusion
Knowing where your screenshots go on Windows 10 can save you time and frustration when you need to locate them. By default, screenshots taken with the built-in feature are saved in the Screenshots folder within the Pictures directory. However, there are various other locations where screenshots can be saved, such as the clipboard, OneDrive, desktop, Game Bar, and custom locations that you can specify in the settings.
Each location has its own advantages and considerations. The Screenshots folderin the Pictures directory is a dedicated location for screenshots taken with the built-in feature, providing easy access and organization. The clipboard offers a temporary storage option, allowing you to quickly paste screenshots into other programs or documents. OneDrive provides cloud storage and synchronization, ensuring your screenshots are backed up and accessible from any device. Saving screenshots directly to the desktop offers convenience and immediate access, but it can lead to clutter if not managed properly.
The Game Bar is a feature specifically designed for gamers, allowing them to capture screenshots and record gameplay. Screenshots taken with the Game Bar are saved in the Captures folder within the Videos directory. This separation helps gamers easily locate and manage their gaming-related captures. The Screenshots folder in the Screenshots directory is another location where Game Bar screenshots and certain third-party application screenshots are stored. It is worth noting that this folder is temporary and screenshots may be automatically deleted after a certain period or when the computer restarts.
In some cases, screenshots may be saved in the Documents folder, depending on the application being used or user preferences. It is recommended to periodically organize and move these screenshots to a more appropriate location. Windows 10 also allows users to specify custom locations for saving screenshots, providing flexibility and alignment with personal preferences and workflow. You can change the default screenshot location by accessing the Storage settings in the Windows Settings menu.
When sending screenshots via email, they are saved as attachments in the email client's sent items or drafts folder. This allows for easy access without the need to navigate to a specific folder on the computer. However, it is important to consider file size and compatibility limitations when attaching screenshots to emails. Temporary files, including screenshots, may be stored in the Temp folder within the AppData directory. It is important to note that temporary files are typically deleted automatically by the system or the application once they are no longer needed.
In conclusion, understanding the various locations where screenshots are saved on Windows 10 can help you easily locate, manage, and organize your screenshots. Whether you prefer the default Screenshots folder in Pictures, saving to the desktop for immediate access, utilizing cloud storage with OneDrive, or customizing your own storage locations, Windows 10 offers flexibility to cater to your specific needs. By knowing where your screenshots go, you can ensure that you never lose important captures and can quickly access them whenever needed.

Post a Comment for "Where Do Screenshots Go On Windows 10: A Comprehensive Guide"
Post a Comment